Change-of-Direction Training: Learn to Brake Before You Turn
Being able to stop, pivot, and change directions is a skill you probably haven’t given much thought to and you probably should, especially if you want to remain injury free.
But how do you add change-of-direction training to a strength-and-endurance week without creating another conditioning session?
Start with controlled stopping, then introduce a planned turn. Keep the approach short, the pace manageable, and the repetitions low.
Much like real plyometric training, finishing before fatigue sets in is the point.
For a healthy athlete, veteran, or hybrid athlete in their 30s or 40s, that is a reasonable coaching starting point—not a research-validated prescription for that age group.
The available research supports a narrower conclusion: approach distance and turning angle change the demands of a planned turn. It does not establish the ideal weekly schedule, a minimum effective dose, or an injury-prevention benefit.
That distinction matters. We can use the evidence to choose sensible practice constraints without pretending it has supplied an entire program.
Change the approach before you chase speed
In an experiment involving 23 experienced male soccer players, researchers compared planned turns after 4-metre and 20-metre approaches. The players, whose mean age was 22.5 years, completed turns of 45, 90, 135, and 180 degrees.
Longer approaches increased the number of deceleration steps. Larger turn angles also increased deceleration-step counts and contact times.
In practice, that means approach distance and turn angle are useful controls. You do not have to make every repetition faster to make it different or more demanding.
It also means a long run into a sharp reversal is not interchangeable with a short approach into a shallow turn. Calling both “cone drills” hides the difference.
For your first sessions, use a short approach and an obvious destination. Leave the long run-up, tight reversal, stopwatch, and surprise direction call for another day.
The limitation: this was an acute biomechanics experiment, not a training-progression trial. Its 4-metre condition is not proof that four metres is a safe starting distance for everyone. The practical setup below borrows the idea of controlling the approach, not a validated safety threshold.
Learn to stop without prescribing one perfect foot plant
Before adding a turn, establish whether you can approach a marked area and come to a controlled stop at an easy pace.
For this practice, “controlled” means you:
- Start reducing speed before reaching the stopping area.
- Use several steps rather than trying to solve everything with one abrupt plant.
- Finish balanced, without a scramble or an extra hop to stay upright.
- Can repeat the task without pain or a steadily deteriorating finish.
These are coaching observation points, not a diagnostic screen or a guarantee against injury.
Do not force a universal number of braking steps. The supplied study found that step counts changed with the task. Your goal is a repeatable stop, not matching an arbitrary footfall pattern.
Use a simple cue: arrive ready to stop, rather than arrive and then discover you need to stop.
If you repeatedly overshoot, slow the approach or give yourself a larger stopping area. Do not respond by demanding a harder final plant. The task currently exceeds the control you can demonstrate.
Set up a short, forgiving practice lane
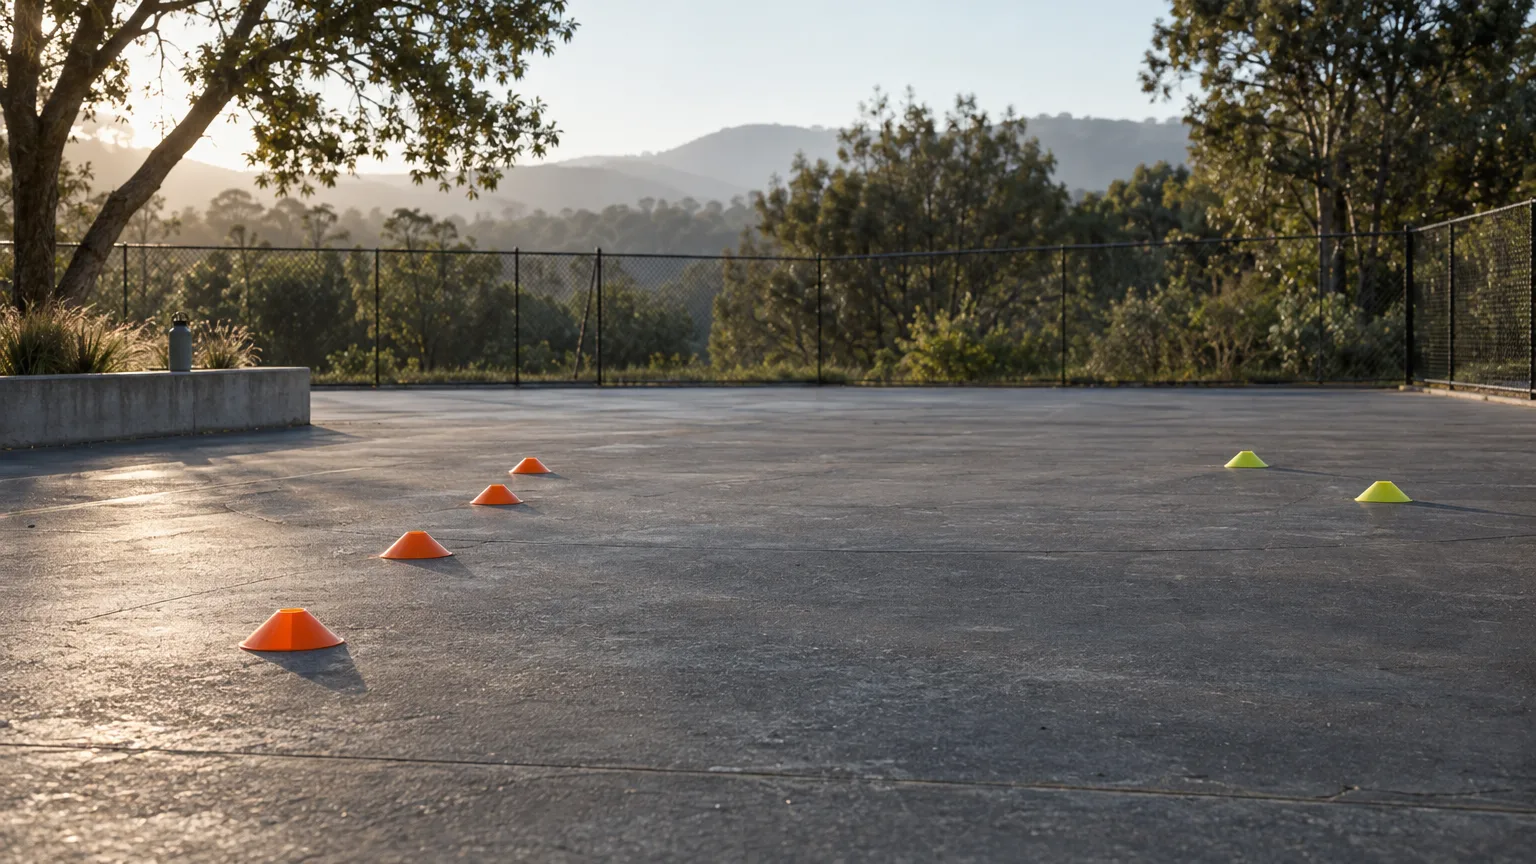
Choose a flat, dry, predictable surface with secure footing and clear space beyond the drill. Avoid slopes, loose gravel, traffic, and crowded gym lanes.
Use low cones or other unobtrusive markers to define:
- A starting point.
- A generous stopping area after approximately four metres.
- A short exit lane angled about 45 degrees to the left or right.
The distances and angle are proposed coaching constraints. Adjust them to make the task manageable; they are not pass–fail standards.
Begin unloaded, in footwear appropriate for the surface. Adding a ruck or other external load would create a different task, and the supplied evidence does not tell us how to prescribe it.
If you have not run recently, begin with walking approaches. Comfortable straight-line running should precede attempts to brake from faster running. This block is not a substitute for rebuilding basic running tolerance.
Current pain, swelling, instability, or an altered gait changes the recommendation. Skip the drill and seek qualified assessment, particularly after a recent lower-limb injury or surgery.
Try this small practice block
The following is a proposed coaching starting point, not an established minimum effective dose.
Start with one block per week. Attach it to an existing session rather than creating another appointment with your training calendar.
Prepare before counting repetitions
Complete your usual warm-up, then walk through the stopping lane and both exits. Add a few easy straight-line approaches only if walking feels comfortable.
Confirm that the surface and footwear provide predictable traction. If you are slipping, change the setup rather than trying to improve your technique on an unsuitable surface.
Perform four controlled stops
Use an easy jog, or a walk if that is the appropriate starting level.
Approach the marked area, reduce speed across several steps, and finish balanced. Reset fully between attempts. Avoid forcing a particular foot to perform all the braking.
If these repetitions are not controlled, keep the entire block at this stage. Turning is optional; stopping is the current task.
Add four shallow planned turns
If the stops are comfortable and repeatable, perform two turns to each side.
Know the direction before starting. Approach easily, reduce speed before changing direction, then leave through the angled exit at an easy pace. Do not sprint out of the turn.
The aim is to join braking and turning without a rushed plant, stumble, or corrective hop. You are practising a known movement, not reacting to an opponent.
Rest long enough to make each repetition deliberate
Walk back and allow roughly 45–90 seconds between efforts, longer if needed. That rest range is a coaching suggestion, not a research-derived optimum.
Eight total repetitions are a ceiling for this first block, not a debt. Stop earlier if control declines.
Allow roughly 10–15 minutes including walkthroughs and resets. If you are breathing too hard to assess the next attempt calmly, extend the rest or finish. A useful practice block does not need to leave a puddle.
Put it where attention and movement quality are available
A practical placement is after warming up and before the demanding portion of an existing workout.
That could mean before a strength session or before a short, easy endurance session. Choose the day when you are most likely to arrive with reasonably fresh legs and enough time to avoid rushing.
Do not initially place it after hard intervals, a long ruck, or a demanding lower-body session. That is a coaching choice intended to preserve practice quality, not a scheduling rule established by the supplied study.
If the week is already crowded, replace a small amount of accessory work rather than automatically adding more training.
For example, you might use the block before one regular strength session and leave the rest of the week unchanged. Keep hard running, lifting, and rucking in their existing roles. The new block has one job: deliberate stopping and planned turning.
During a disrupted week of travel, duty, or poor recovery, maintaining the current level—or skipping the block—is preferable to squeezing it into an exhausted finish.
Progress one constraint at a time
The study’s findings support treating approach distance and angle as separate variables. They do not establish which progression sequence produces the best long-term result.
In practice, use a conservative coaching rule: change one thing, then see whether you can still complete the task cleanly.
After two separate exposures with controlled repetitions and no new symptoms during practice or by the following day, consider one small change:
- Move from walking to an easy jog.
- Slightly increase approach pace while keeping the lane and angle unchanged.
- Lengthen the approach while deliberately holding the pace easy.
- Make the turn somewhat sharper while keeping the approach short.
- Add another practice exposure without also increasing the first block.
Two exposures are an observation window, not a validated readiness test. There is no requirement to progress every week.
A 90-degree turn can be a later option. A 180-degree reversal is not the graduation requirement. Select the task because it serves your training needs, not because the cone layout looks more impressive.
Reactive direction changes are another separate progression. The supplied experiment used planned turns, so it does not establish transfer to unpredictable tactical movement.
Use a simple stop, hold, or progress decision
Record three things after the block: whether the repetitions stayed controlled, whether either direction felt distinctly less manageable, and whether symptoms appeared during practice or by the next day.
Progress cautiously when the current task is consistently comfortable and repeatable.
Hold the setup when you are still learning it, one direction needs more attention, or the rest of the week is unusually demanding. Use the less-controlled direction to set the task difficulty rather than rushing it to match the other side.
Regress or stop when you repeatedly overshoot, stumble, or need increasingly abrupt corrections. Reduce pace, widen the stopping area, return to straight stops, or end the block.
Pain is not a cue to find a more determined foot plant. Stop for new pain, swelling, giving way, or a change in gait. Persistent or recurring symptoms warrant assessment by a qualified clinician before you resume progression.
Success here is modest and observable: the same planned task becomes more repeatable without requiring harder efforts. That does not prove improved field performance or reduced injury risk. It tells you whether this practice is becoming more manageable.
Frequently asked questions
Is change-of-direction training the same as agility training?
This block uses a direction selected before movement begins. It does not train the decision-making demands of reacting to an unexpected cue. The supplied evidence concerns planned turns, so avoid treating this practice as a complete agility program.
Will this prevent knee or ankle injuries?
That benefit is not established by the supplied source. The experiment measured movement characteristics and performance during planned tasks, not injury rates after a training program. Use the block to practise movement, not as an injury-prevention guarantee.
Does the evidence apply to athletes in their 30s and 40s?
Only indirectly. The participants were experienced male soccer players averaging 22.5 years old. Applying the findings to older tactical or hybrid athletes requires judgment. The short, easy starting block is a coaching proposal that should be adjusted to training history, current tolerance, and symptoms.
Can I turn these drills into conditioning?
You can make repeated turns tiring, but that changes the purpose of this block. Keep rest generous and repetitions limited while learning. If conditioning is the goal, program it separately rather than letting fatigue quietly take over your technique practice.
Keep the job small
Start with one short block: controlled stops, then shallow planned turns if the stops are ready. Keep the approach easy, recover between repetitions, and adjust one constraint at a time.
You do not need another exhausting session. You need enough space and attention to practise braking before asking for a sharper turn.
Strategic Athlete Foundations is a structured strength-and-endurance training program for busy professionals.
Keep Learning
1% Better Every Day.